First I sart with a sketch on the greenware that compliments the body of the vessel
Working from the outer edges in, I lay 3 washes of color glaze, lightest to darkest, leaving white in the center and shortening the length of the overlay from the outer edges toward to center
Next, I surround the image with a complimentary or lighter color that will cause the main color to pop!
Next I add in the flat black spots
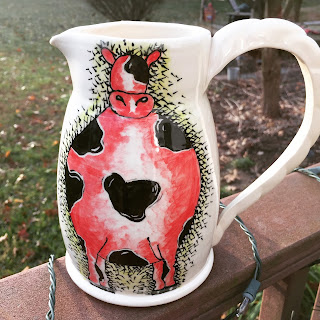
Then the really fun part. Using a very thin liner brush, I outline all edges and use crosshatching strokes beginning tightly at the outer edges and spreading as they go out. Lastly, I did a little sgraffito around the edges of the black spots but I forgot to take an "in process" photo of that . You can see the effect on the finished piece below.
Available on my website. Just click on the image.
Here's another one, Sadly, it didn't survive the kiln. It had a big "S" crack in the bottom.
Here is how potters feel when they find a piece comes out of the kiln with an "S" crack in it! :